How To Adjust Exposure Levels From A Photo Scan With GIMP

If Your Photo Scans Are Coming Out Too Dark Or Bright, Here's How To Fix This
Read these free tips, and you'll learn...
- One easy step on how to adjust photo scan exposure in GIMP
- To brighten your scan when it's too dark
- To fix your scan if it's too blown out, and bright
- Once you understand how to fix exposure, the rest of the scans will go faster
- You can do this with free editing software, GIMP... Download GIMP here
Ready? Let's go!
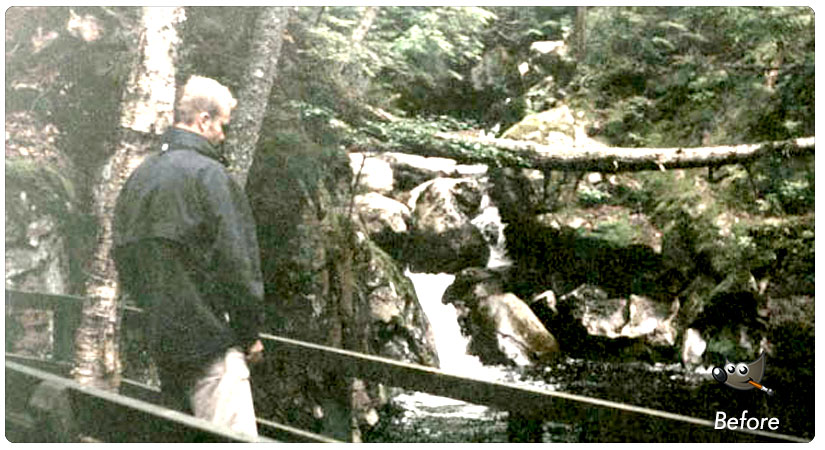
Here's A Before And After Photo Scan Fixed In GIMP


Above: The first image is blown-out, and too bright. Below it is after I've fixed it in GIMP.
Let me show you what to do... its easy.
1. Here's How To Adjust Exposure From A Photo Scan In GIMP
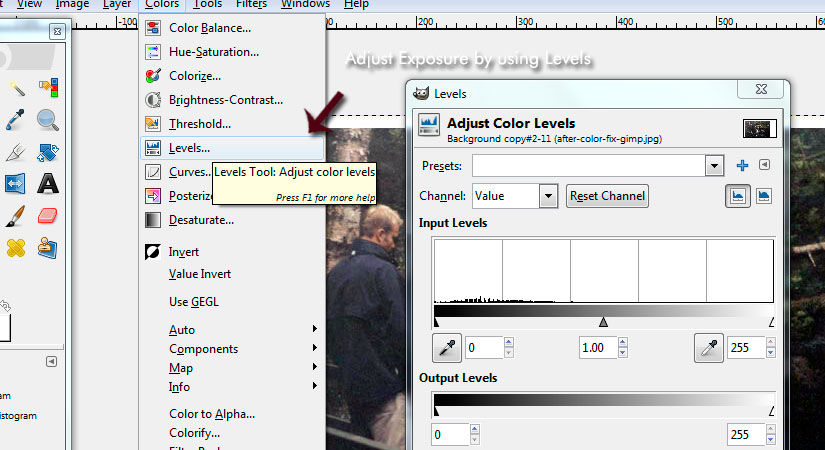
Very simple. Use command:
- Colors -> Levels
And you'll see something like this...

Above: Level is the best way to adjust photo scan exposure. And it only takes one step to fix!
Here's how to use Levels...
Do you see the "Input Levels"? Now do you see the gray arrow, in the middle?
Well, say your photo scan is too dark, then move the gray arrow left, toward the black arrow. That will brighten up your image.
If your photo is too bright, say a beach or outdoor photo, move the gray arrow right toward the white arrow. This will darken it a bit.
That's it my friend! You're done.
Table Of Contents: How To Edit Photo Scans Using GIMP
Free Ebook: Tells You Secrets To Getting High Quality Slide, Negative, Photos Scans In Half The Time
Which of these scanning troubles do you want to overcome?
- What's the best resolution / DPI to scan your slides, negatives, and photos -- so you don't lose details
- Best method to digitize slides, negatives, photos using your regular flatbed or film scanner
- How to clean your negatives, slides, and photos before you scan them -- so you don't scratch them
- What side should you scan a slide or negative -- so they're not backwards or facing the wrong way
- How to setup your scanner to get higher quality digital images -- 24bit JPEG? 48bit TIFF?
- How to fix your digital images using Digital ICE, GIMP, or Photoshop and make them look new
- How to improve your scan workflow so you can double your productivity and finish your project twice as fast
- Understand the technical stuff of a digital image so you can make sideshow videos, reprints, and more!
Hey, my name is Konrad. I've been scanning professionally since 2005. I've helped multi-billion dollar companies, pro sports teams, pro photographers, artists, museums, book publishers, etc. I've scanned over 930,000 slides, negatives, photos.
The reason I'm telling you this is because no matter what challenge or frustration you're having, I know exactly what you're going through. So, to help you RIGHT NOW, I've put together a super simple scanning guide to get you started.
