How To Fix Faded Slide Scan Colours So They Look Natural Using Photoshop
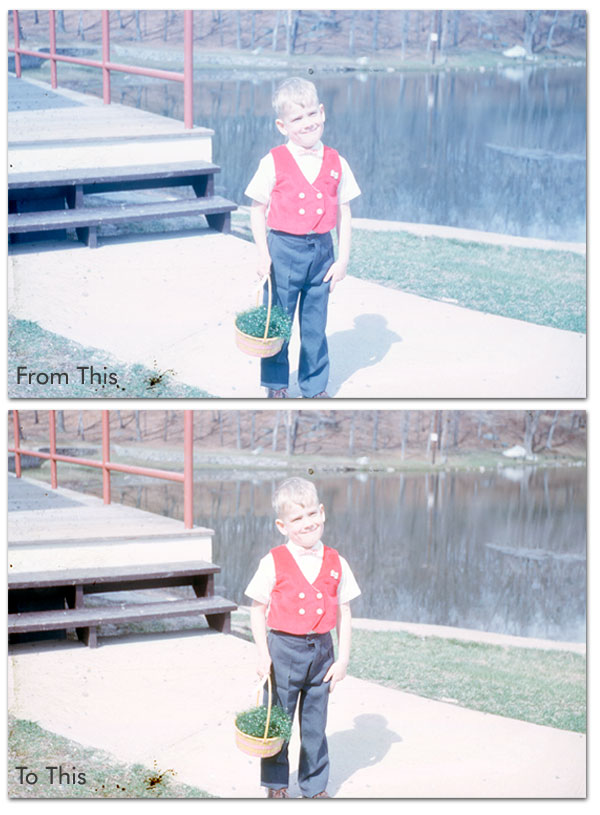
Here are two simple steps to make your slide scan colours look natural...
Remove "Filmy" Look Of Your Slide Scan
Check out what you're going to learn...

If you look closely, the natural scan is a bit blue and flat. To fix this is quite easy.
Open your scans(s) in Photoshop, and here's the commands...

Command: Image -> Auto Color
That's it!
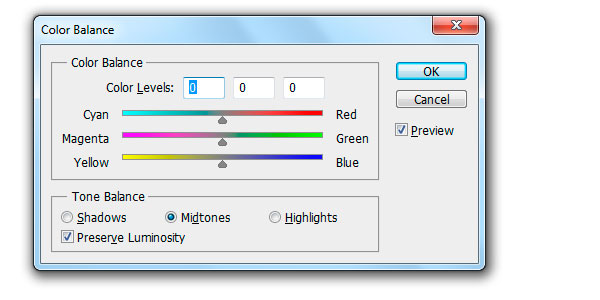
And it doesn't matter if your slide scan is too blue, green, or red... this command works on any colour issues like this. All this stuff is called Color Balance. Have a quick look...

To open the Color Balance Tool, click Ctrl + B.
You see, every image is made up of 3 colours: Red, Blue, Green. And whenever your scan is too blue, green, or red, it's because one colour is DOMINATING the others.
So what Auto Color does is, it evens out all 3 colours. So no one colour is dominating the others.
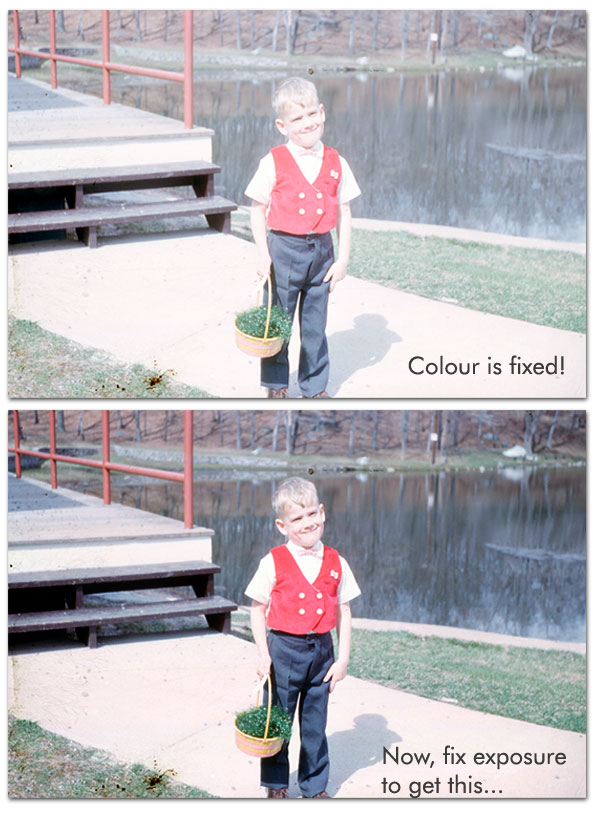
Next Step: Adjust Exposure Levels
Wait. We're not done. Colours are fine. But if you notice, the image looks a bit bright or washed out. You can fix this by adjusting the exposure.
In the next step I'm going to show you how too do this...

Free Ebook: Tells You Secrets To Getting High Quality Slide, Negative, Photos Scans In Half The Time
Which of these scanning troubles do you want to overcome?
- What's the best resolution / DPI to scan your slides, negatives, and photos -- so you don't lose details
- Best method to digitize slides, negatives, photos using your regular flatbed or film scanner
- How to clean your negatives, slides, and photos before you scan them -- so you don't scratch them
- What side should you scan a slide or negative -- so they're not backwards or facing the wrong way
- How to setup your scanner to get higher quality digital images -- 24bit JPEG? 48bit TIFF?
- How to fix your digital images using Digital ICE, GIMP, or Photoshop and make them look new
- How to improve your scan workflow so you can double your productivity and finish your project twice as fast
- Understand the technical stuff of a digital image so you can make sideshow videos, reprints, and more!
Hey, my name is Konrad. I've been scanning professionally since 2005. I've helped multi-billion dollar companies, pro sports teams, pro photographers, artists, museums, book publishers, etc. I've scanned over 930,000 slides, negatives, photos.
The reason I'm telling you this is because no matter what challenge or frustration you're having, I know exactly what you're going through. So, to help you RIGHT NOW, I've put together a super simple scanning guide to get you started.
