How To Load Negative Film On Flat-Bed And Laser Scanners
Here's a fast way to load your negative film...
Take out a negive strip. And have a closer look. You'll see something like this...

You'll notice that each negative strip will have a bunch of info printed on it.
Once you've found this info, here's what to do...
1. If You're Using A Flat-Bed Scanner

If using a flat-bed scanner, make sure the lettering is backwards, facing you.
2. If You're Using A Film Scanner

If using a film scanner, make sure the lettering is facing you.
One side will be smooth and glossy. The other will be bumpy, have lines, and be a bit dull. These two different sides are the "positive" and "negative" of a slide.
3. What If You Don't Have A 35mm Negative But A Different Format
If you're scanning other negative formats (126, medium, large, contact sheets, etc.), here's how to scan the correct side.
A Negative Has Two Sides
Take your negative (make sure to use tweezers to handle them). Bring your negative to a light source (a light or window). Now flip it back and forth. You'll notice that one side will be dull and the other will be shiny.
The shiny side (or "reflective" side), will be smooth. While the dull side (or "matte emulsion" side) you'll notice small lines, bumps, ridges. The dull side is where your negative is "printed" using emulsion. That's why you get bumps and ridges.
What Side Do You Scan Then?
If you're using a flat-bed scanner, place your negative with the dull / bumpy (matte emulsion) side UP.
If you're using a film scanner, place your negative with the dull / bumpy side DOWN.
Your scanner might be different. But here's the most important thing to remember:
Matte Emulsion: is the "negatives" side of a negative. It will be dull, bumpy, and you'll see lines that make up the image.
Reflective Side: this is the "positive" side of a negative. It will be smooth and reflect a lot of light.
Once you now this difference, read your manual and they'll tell you what side you should place the matte emulsion (negative) side.
4. How To Setup Your Scanner To Scan Negatives
Most of this stuff you'll find in your manual. But for some quick tips on how to setup your scanner, here's what I do:
My Epson intro screen has this:

Right away it is asking me what "Document Type" I am scanning. Your scanner might call this "Source" or "Original". But basically this is where you want tell your scanner you are scanning slides.
Except, they do not call it "negatives". They call it "film". Anything you can "see through" will be film. And your photos are called "reflective". Anyway, you have positive film, and negative film. As you can see in Number 2 choose "Colour Negative Film" to scan negatives.
To help you with all this clutter, here is a cheat sheet:
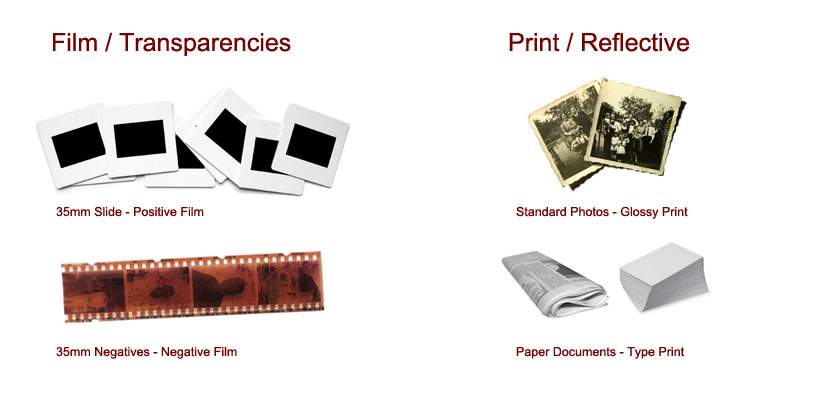
You have two types of "formats": 1. Film or sometimes called Transparencies. And, 2. Print or sometimes called Reflective. And under Film you have slides and negatives. And under Print you have your photos and paper.
Free Ebook: Tells You Secrets To Getting High Quality Slide, Negative, Photos Scans In Half The Time
Which of these scanning troubles do you want to overcome?
- What's the best resolution / DPI to scan your slides, negatives, and photos -- so you don't lose details
- Best method to digitize slides, negatives, photos using your regular flatbed or film scanner
- How to clean your negatives, slides, and photos before you scan them -- so you don't scratch them
- What side should you scan a slide or negative -- so they're not backwards or facing the wrong way
- How to setup your scanner to get higher quality digital images -- 24bit JPEG? 48bit TIFF?
- How to fix your digital images using Digital ICE, GIMP, or Photoshop and make them look new
- How to improve your scan workflow so you can double your productivity and finish your project twice as fast
- Understand the technical stuff of a digital image so you can make sideshow videos, reprints, and more!
Hey, my name is Konrad. I've been scanning professionally since 2005. I've helped multi-billion dollar companies, pro sports teams, pro photographers, artists, museums, book publishers, etc. I've scanned over 930,000 slides, negatives, photos.
The reason I'm telling you this is because no matter what challenge or frustration you're having, I know exactly what you're going through. So, to help you RIGHT NOW, I've put together a super simple scanning guide to get you started.
